How to Build a Simple Coil: The Beginner’s Guide to Building Vape Coil
If you’re into vaping and want more control over your experience, learning how to build a simple vape coil is a great place to start. Coil building gives you the freedom to customize your vape, enhance flavor, increase vapor production, and save money in the long run. Whether you’re chasing clouds or looking for the purest flavor, understanding the process of building vape coil setups is essential.
This guide will walk you through everything you need to know—from materials and tools to the building, testing, and wicking stages. Even if you’re new to DIY vaping, you’ll walk away confident and ready to build your first simple coil.

Why Building Vape Coil Matters
When you build your own coil, you take charge of your vaping experience. Unlike pre-built coils, DIY coils give you precise control over resistance (ohms), material, and size. This can directly impact flavor intensity, vapor thickness, and throat hit.
Factory coils are convenient but often expensive and restrictive. DIY coil building is not only cost-effective, but it also helps you understand your vape device on a deeper level. Plus, once you master the basics, you’ll find building vape coils to be an enjoyable and rewarding hobby.
What You Need to Start Building Vape Coil
Before you start building, make sure you have all the essential tools and materials. Safety and precision are key here, so having the right gear helps you avoid mistakes.
Tools and Materials:
- Kanthal or Nichrome wire (24–28 gauge recommended for beginners)
- Wire cutters
- Ceramic tweezers
- Coil jig or screwdriver (for wrapping)
- Ohm reader or regulated mod
- Small scissors
- Cotton wick (organic cotton or Muji pads)
- RDA or RTA deck
Most of these items are available in coil-building kits. If you’re just starting, consider investing in a kit to avoid buying items individually.
Understanding Coil Wire Types and Gauge
Before you wrap your first coil, let’s break down wire types and thickness.
Wire Materials:
- Kanthal (A1): Easy to work with and perfect for wattage mode. It holds shape well and is beginner-friendly.
- Nichrome: Heats faster than Kanthal, offering a warmer vape. It’s slightly harder to work with but gives excellent results.
- Stainless Steel (SS316L): Usable in both wattage and temperature control modes. It has a clean flavor profile but is springy.
Wire Gauge:
The lower the gauge number, the thicker the wire.
- 24 gauge: Lower resistance, faster heat-up, more vapor.
- 26–28 gauge: Balanced resistance and easier to build for beginners.
For your first build, 26-gauge Kanthal is a solid choice.
Guide to Building Vape Coil
Now that you have the materials and understand the wire, let’s build a simple coil.
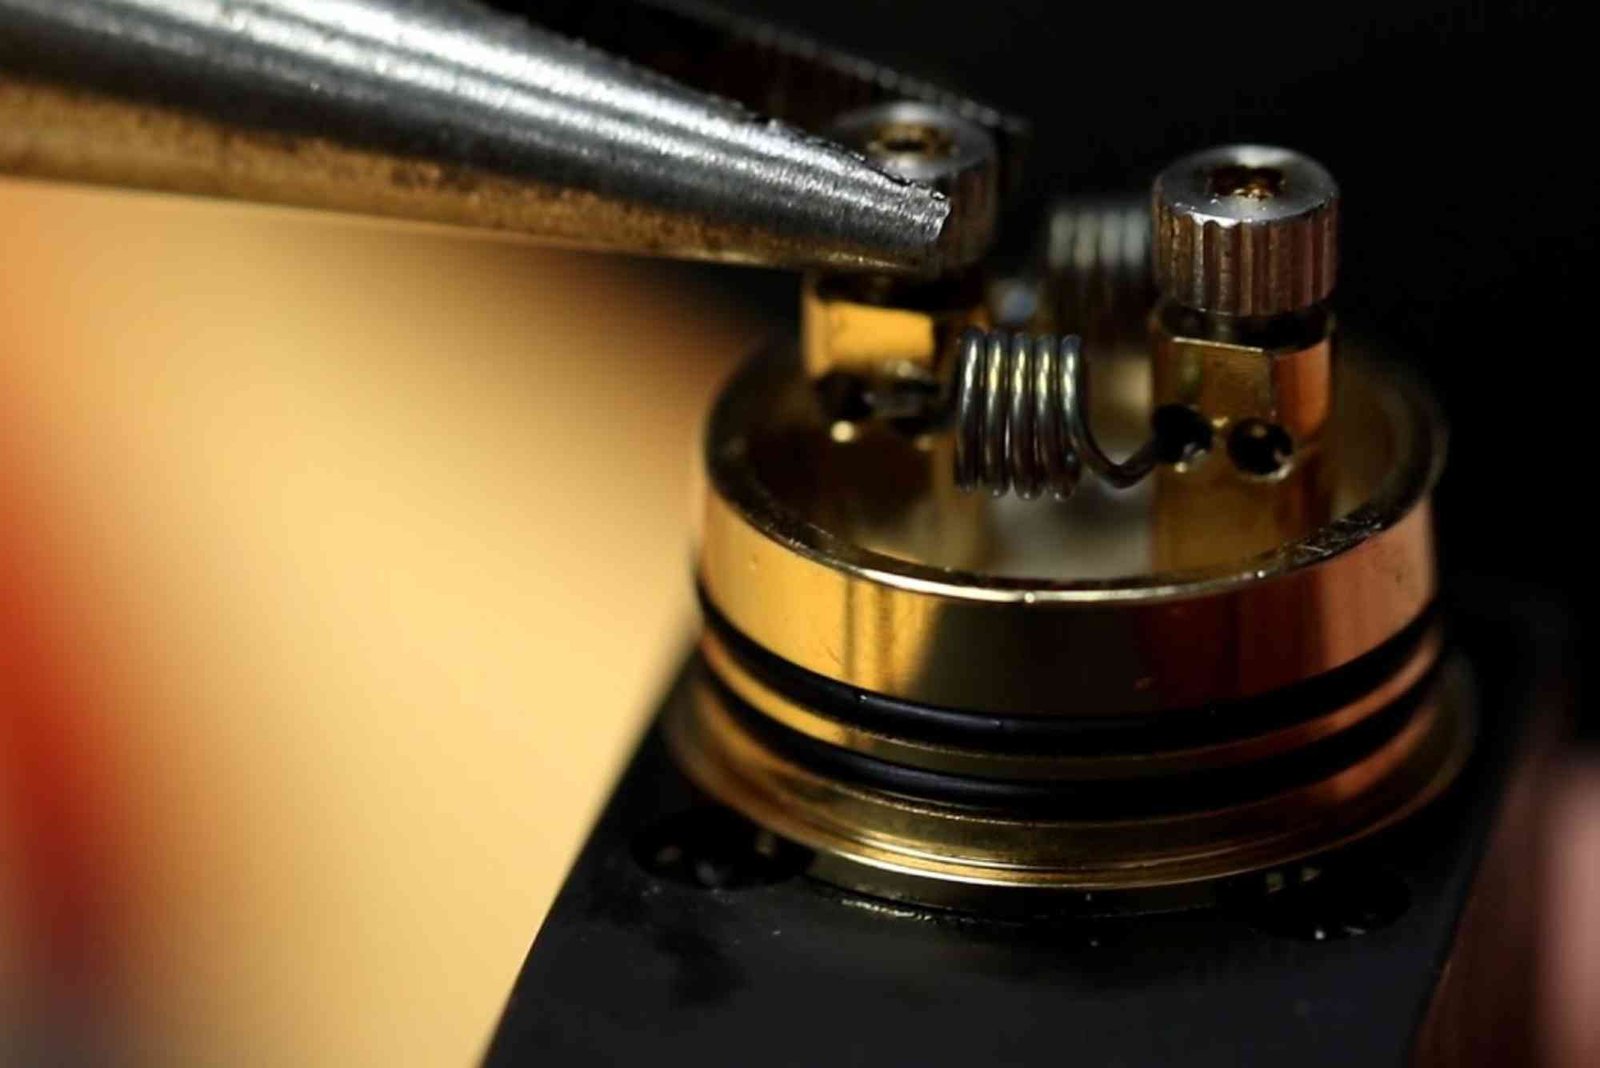
Wrapping the Coil
Cut about 5–6 inches of wire. Using your coil jig or screwdriver, wrap the wire around it 6–8 times. Keep the wraps tight and evenly spaced. This is called a “micro coil.” The number of wraps determines the coil’s resistance—more wraps increase the resistance.
Hold both ends of the wire and gently compress the coil with tweezers to tighten the shape.
Installing the Coil
Insert the coil into the posts on your RDA or RTA deck. Tighten the screws while keeping the coil centered and slightly elevated from the deck. This allows better airflow underneath the coil, enhancing performance.
After mounting, clip the excess wire as close to the posts as possible using your wire cutters.
Dry Burning and Adjusting
Before adding a wick, pulse the coil at a low wattage to remove hotspots. This step helps the coil glow evenly from the center out. Use ceramic tweezers to gently strum or squeeze the coil if you see uneven heating.
Never use metal tweezers while firing the coil—they can short-circuit your mod.
Wicking the Coil
Cut a thin strip of cotton and roll one end to a point. Slide the cotton through the center of the coil with slight resistance. If it moves too freely or too tightly, adjust the size.
Trim the cotton so it rests comfortably in the juice wells. Fluff the ends slightly with tweezers to improve juice absorption. Make sure there’s enough room for airflow beneath the coil.
Juicing and Testing
Drip e-liquid directly onto the wick and coil until fully saturated. Fire the coil gently a few times to ensure it heats smoothly without any sizzling or dry hits.
If everything looks good, reassemble your atomizer and vape away.
Safety Tips When Building Vape Coil
Coil building isn’t dangerous if you follow the right safety measures. Always check your coil’s resistance using an ohm reader before firing. This helps you avoid short circuits and battery issues.
If you’re using a mechanical mod, ensure your battery can handle the resistance of your build. Use Ohm’s law (V = I × R) to calculate safe current draw. For regulated mods, the chip usually handles safety, but it’s still best practice to know your numbers.
Always keep your build area clean and your tools dry. Don’t reuse wire if it’s been damaged or overly burnt.
Common Mistakes Beginners Make
If your first few coils don’t perform perfectly, don’t get discouraged. Here are some common beginner mistakes to watch for:
- Too many or too few wraps: This throws off the resistance and heat.
- Loose coil legs: They can cause hotspots or inconsistent heating.
- Poor wicking: Too tight or too loose can lead to dry hits or leaking.
- Skipping resistance check: Firing without testing resistance can damage your device or cause injury.
Learning from these mistakes will make your next build better.
Advantages of Building Your Own Vape Coil
Aside from saving money and enjoying a fully customized vape, here are some extra perks:
- Long-term cost savings: Wire and cotton are cheaper than factory coils.
- Better performance: Tailor resistance, flavor, and clouds to your preference.
- Fun and rewarding: Many vapers find coil building relaxing and satisfying.
- Educational: You learn how vaping works and improve device maintenance skills.
FAQs
What is the best wire for building vape coils?
Kanthal is the best choice for beginners because it’s easy to shape, durable, and great for wattage mode.
How many wraps should a beginner do?
Start with 6–8 wraps of 26-gauge wire around a 2.5mm jig. This usually gives a resistance between 0.7 to 1.0 ohms, perfect for learning.
Is it safe to build your own coils?
Yes, as long as you check resistance, use the right battery, and follow Ohm’s law. Regulated mods offer built-in protections.
Why is my coil heating unevenly?
Uneven heating or hotspots usually come from inconsistent wraps or poor contact with the posts. Try re-wrapping or adjusting with tweezers.
How often should I change my coil or cotton?
Cotton should be changed every 2–3 days for best flavor. Coils can last 1–2 weeks if cleaned regularly.